HTC Vive: Ultimate Tricks and Tips Guide

Pre-VR Checklist
The first thing you’ll face when setting up the HTC Vive using this guide is that you need to find a way to mount the sensors on the walls! If you’re alright with drilling holes into your walls then you can use the brackets that come with the HTC Vive and you’ll be fine. In spite of being the preferred way of installing the sensors this certainly won’t be a viable solution for everyone.
If you want to avoid holes in your wall and/or want to travel with your HTC Vive, then the next options will be your best bet.
Pro-Tip: When mapping a small room, you can sometimes exceed the real edges a little bit and you’ll still be fine in the virtual world. This is sometimes necessary in order to reach the minimum dimensions required by the HTC Vive.
If you are looking for a more up-to-date headset, then maybe you should be looking at where to get a discounted Oculus Quest that’s capable of providing an experience one step closer to reality. This VR set is a little more costly and it’s always nice to get a good deal!
HTC Vive mounting solution #1: Mini Tripods
The easiest way to set up the HTC Vive sensors without mounting them to the walls is to use a combination of small tripods and clamps with your existing furniture. The idea is simple: Use your existing furniture (bookshelves, cabinets, etc) for height and then fine tune the placement & angle with the tripod.
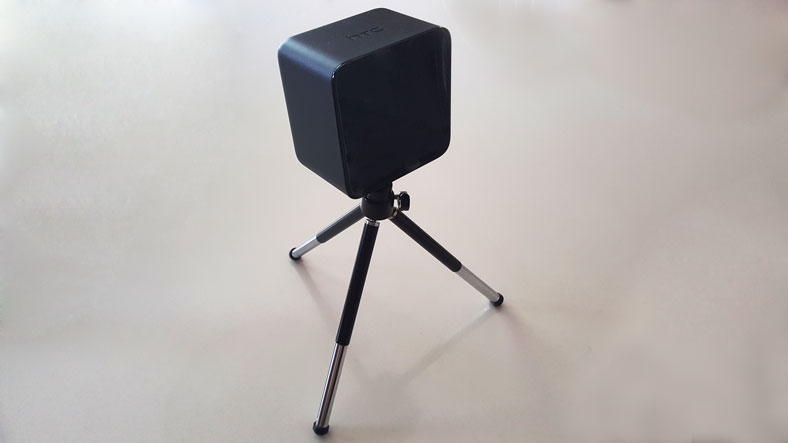
- Here is a small camera tripod that works amazingly well when well placed and can be had for under $10: Polaroid Heavy-Duty Mini Tripod.
- For different furniture solutions, this camera mount with a bending arm will be your best best.
HTC Vive mounting solution #2: Large Tripods & Floor to Ceiling Poles
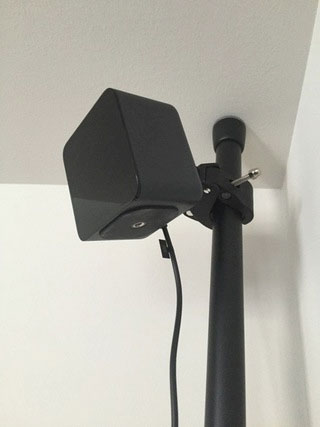
Photo Credit: Znelson
Larger tripods are available as well and provide a great alternative to wall mounting the sensors. The downside is that the common tripod requires quite a wide base and can take up quite a lot of space. This can work in some cases (I’m using one myself) however it is far from ideal if you’re concerned with minimizing the footprint in your living room.
- If you’re going the large tripod route, use these tripods for the base.
- Combine those tripods with these small swivel ball heads to be able to properly mount the sensors at the correct angle.
However, my favorite solution for mounting the HTC Vive sensors with the lowest possible footprint is to use floor to ceiling poles with camera mounting brackets.
- The ideal solution is to use Manfrotto spring loaded floor to ceiling poles which fits nicely in any corner
- Fasten the poles with quick release clamps for cameras and you can now mount your sensors in any room without taking up too much space.
By using one of the solutions, you can quickly install the HTC Vive sensors in pretty much any room without drilling any holes. Best of all, you can move it around or take it down all-together if you want to travel with your headset.

Get The Highest Image Quality Possible On The HTC Vive
One of the best ways to increase the image quality on the HTC Vive is the pixel density super sampling hack. You are essentially using super sampling in order to increase the image quality inside the HTC Vive. To do so, all you need to do is edit your steam file or use this program. Warning: You’ll need a high end videocard to be able to achieve this higher image quality without sacrificing too much performance. (This is probably the best reason to get GTX 1080).
Pixel Hack (Super Sampling) For HTC Vive
- Go to your Steam option folder (typically this is c:\program files (86x)\steam\options\)
- Open the steamvr.vrsettings file using notepad
- You must edit the file in 2 ways: Add a comma and add the line: “renderTargetMultiplier”: 2.5


- Save the file
- Launch the game and adjust the multiplier value depending on the performance

Photo Credit: Mulleman
Physical adjustments
It’s not secret that if your headset isn’t seated properly on your head, you’re going to get a blurry and distorted image. That’s why it is important to fine tune the headset position and straps in order to achieve the best image quality.
What most people don’t know (I don’t know why HTC doesn’t include this in the official setup instructions) is that you can adjust the field of view of the headset by using the round, rubber headstrap attachments. You can temporarily unlock them and move the headset closer (or further) away from your head.
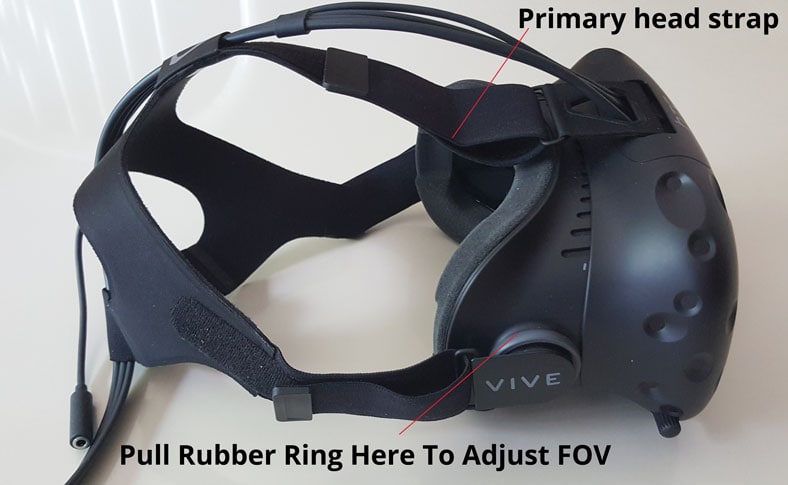
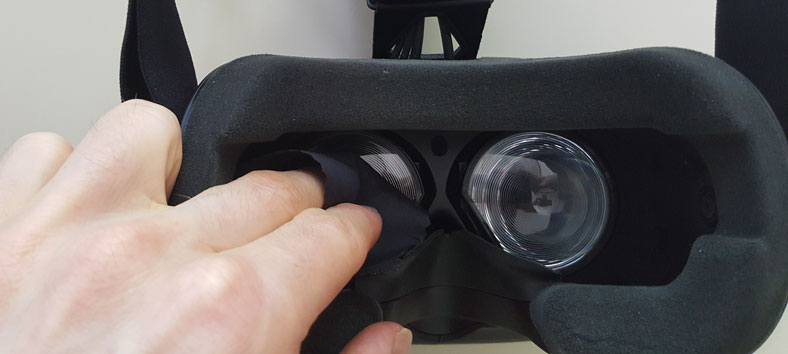
- Gently pull on the round rubber circles on side of the headset. They will unlock and allow rotation.
- Rotate them to adjust the distance of the headset to the head. The closer the headset is, the larger the field of view will be. If your eyelashes are touching, then you’re too close!
- Typically the closer you are, the more immersive the experience with be. Alternatively, restricting the field of view can help ease motion sickness in some cases.
After you’ve adjusted the FOV, you should fine tune the headset position on your head. A well fitted headset will provide the highest image quality. For an in-depth explanation on what a restricted FOV to ease VR motion sickness, view the video.
- Start by loosening all 3 straps on the HTC Vive before putting it on your head. You’ll want to set them so they hold but you still get a little play in order to be able to adjust them.
- Tie up any long hair… if you have short hair or are bald, you’re all set! (Optional)
- Begin by adjusting the top/back strap. This is the most important one and should be adjusted so that the headset sits level on your head. This strap will also dictate the level of comfort that you experience with the headset. Too tight and you’ll have a headache!
- Once you properly adjusted the back strap, proceed to adjusting the side straps equally so that it’s snug on your head.
How it sits on your head will make the biggest difference in clarity and sharpness. Blurry vision is typically caused by the headset not being properly set on your head but can also be caused by condensation in some cases. For a VERY detailed guide on micro-adjustments for the HTC Vive, Rainfold expands on the subject.
Cleaning the HTC Vive
Fortunately the HTC Vive doesn’t get as dirty as the Samsung Gear VR so this is a little bit less of a concern. However because even a small spec of dust can ruin your VR experience, it is important to keep the lenses of your HTC Vive absolutely spotless. Here are my 2 favorite ways of maintaining perfect lenses.
- Using an eye wear microfiber cloth, gently dust the lenses in circular motion. There is no need to apply any pressure because you’re just trying to remove dust specs.
- Alternatively, using an air rocket can be an efficient way to clear out dust spectacles on the lenses.
The foam headband can eventually get sweaty (and dirty) after extensive usage. Fortunately there is an extra one that comes with the headset that you can replace when it gets dirty. They aren’t really washable so the best solution will be to get replacement foam pads when you’ve gone through the original factory foams. As a bonus, some of them claim to be more comfortable than the original.
Alternatively, if you’re going to be bringing your HTC Vive to a conference or to work, then you might want to consider using disposable virtual reality headset covers. They are the perfect sanitary solution if you’re going to be passing your headset around.
Replacement Lenses
Last but certainly not least, you can get prescription lenses for the HTC Vive which will help people with glasses that don’t fit properly. Even though changing the lenses can be a hassle it is a great option for those that are near / far sighted.

 Improving your Sound Quality For Increased Immersion
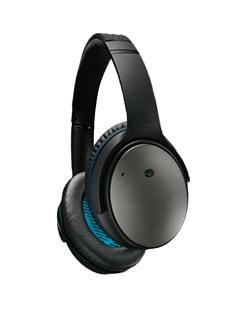
Headphones are typically awkward with the HTC Vive because you have to fit them over the headset. If you’re going to go the headphone route, then I recommend high quality noise cancelling headphones like the Bose QC 25.
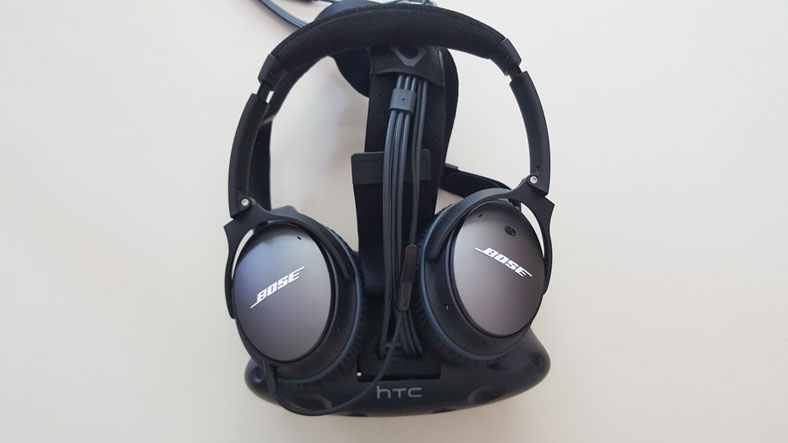
A good pair of earbuds is your best bet because they are light, inexpensive and are less likely to fall off while you’re using the headset. (Plus, you get some included with the headset)
One common issue that people run into when plugging in a new headset is that the sound doesn’t automatically come out through the headset. To resolve this, you must adjust the sound output in the SteamVR settings.
- Open the settings in SteamVR
- Click on Audio
- Set playback to HTC-Vive or Speakers (USB-Audio Device)
Alternatively, if you still aren’t hearing sound, you’ll want to check out Windows’s playback devices.
- Right click on the volume button and go to “playback devices”
- Click on HTC-VIVE-0
- Right click and “Set as Default”
This should do the trick! I find that the noise cancelling really helps immerse you in the virtual world so if you can, try to get some for your HTC Vive.
Best HTC Vive Headphones Chart
| NAME | Description | Link |
|---|---|---|
| Bose QC 25 QuietComfort | The quiet comfort noise cancelling headphones from Bose provide excellent sound combined with industry leading noise cancellation technology which increases immersion. | Get The Latest Price |
| Sennheiser HD 202 | The entry level Sennheiser HD 202 II headphones provide an inexpensive way to enhance your HTC Vive experience. Their small size make them easy to fit while using the headset. | Get The Latest Price |
| Bose SoundTrue | The mid-range Bose SoundTrue headphones provide good stereo sound while being comfortable for long gaming seesions | Get The Latest Price |
How to enable the HTC Vive microphone
The microphone including with the Vive is surprisingly good and most people don’t even know it exists! In order to take advantage of it, you can enable it to use in your games by properly setting it up in Windows.
- Go to your sound options and right click on icon.
- Go to recording devices.
- Select the HTC Vive microphone as the default.
Warning, this will also affect your other games!
Alternatively, you can also try improving the microphone’s quality by
- Go to sound options, recording devices (same as before).
- Click on properties of the USB audio.
- Disable the gain AGC.
- Set the volume to 100%.
Make sure the boost gain (AGC) is also disabled in the SteamVR audio settings.
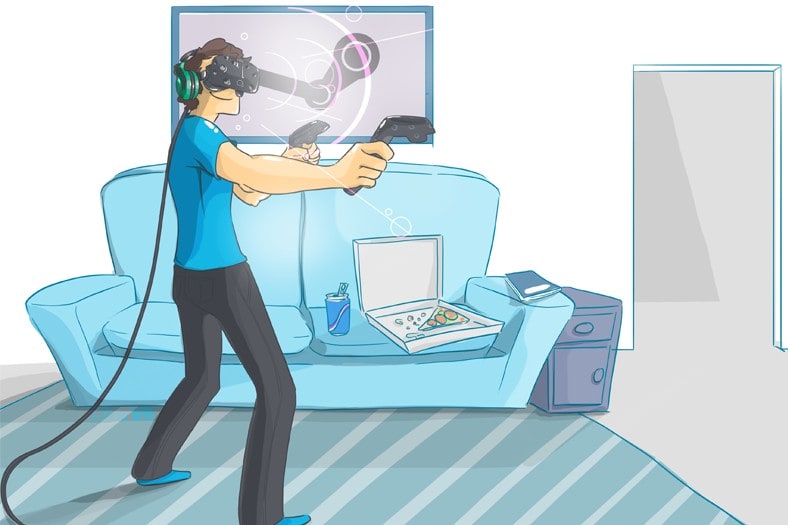
Reducing VR Associated Motion Sickness
To reduce motion sickness using the virtual reality headset, avoid playing racing games or any other game that rapidly throws you around. Although they are currently developing a tunnel vision technology in order to help with VR motion sickness, the worst offenders will leave you feeling nauseous for hours.
Eating right before using VR tends to increase motion sickness as well. You can actually ‘build up’ a tolerance over time and be less susceptible to motion sickness once you get used to it. (Even though I feel it never really goes away). Doing small 5-10 minutes sessions at first seems to help. I found that taking a bit ginger can also help with motion sickness.
- Don’t eat before using the VR headset
- Search for field of view options. Lower fields of view help with motion sickness
- Ginger tablets aid with nausea and motion sickness
As new applications are released, new techniques are being implemented into the applications/games to reduce the motion sickness. One new technology is implementing a virtual nose and it seems to help! Hopefully this will be a thing of the past in a few years!

 How to Watch Videos Using The HTC Vive
The easiest way is to use a virtual desktop tool such as “Virtual Desktop” or “Big Screen” even though it doesn’t seem to have the refinement of the Oculus Video app. The top applications are currently Virtual Desktop, Big Screen, CINEVEO and Whirligig. (Hint: Big Screen is free and awesome!)
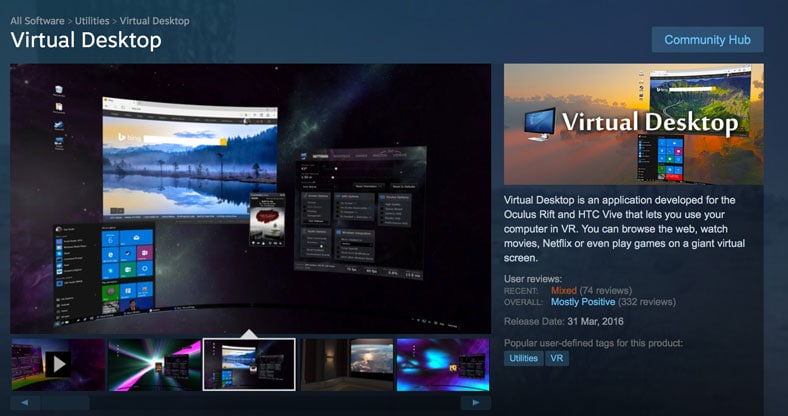
Download Virtual Desktop from Steam
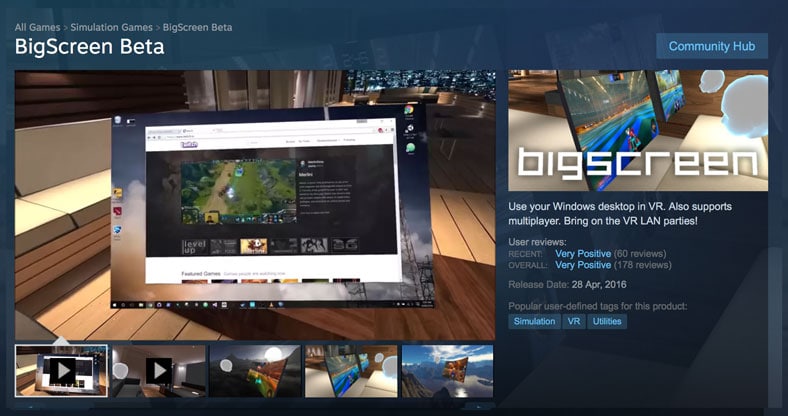
Download BigScreen from Steam
You’ll also want to get WebVR for your browser so you can click to send the content directly to your headset. This is super useful (and fun).
Watching 3D Movies In Style
To watch 3D movies on the HTC Vive, one method is to launch the Virtual Desktop app, go to the video tab, open the video using VLC or Media Classic and then select the correct format.
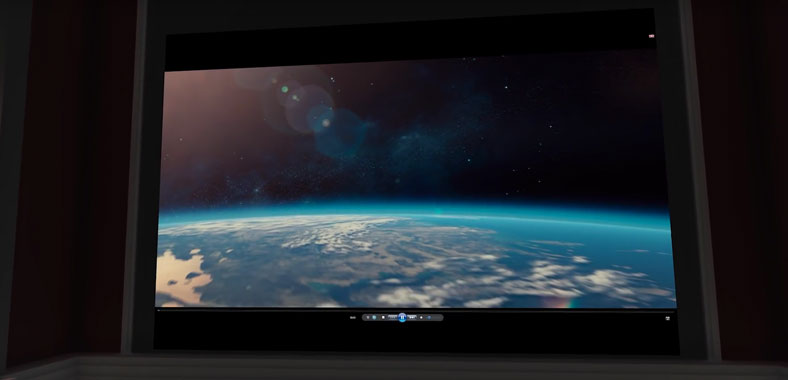
- Start the Virtual Desktop using the SteamVR mode.
- Set the environment in the application to Home Theater.
- Load up media player classic.
- When the movie starts, press F7 and you’ll enter 3D mode.
Make sure to use the super sampling trick with this in order to squeeze the most quality that you can out of it. As great as the HTC Vive is, the resolution isn’t the highest (but the engagement and experience makes up for it!).
As a bonus, if you want to watch movies in bed then I strongly recommend a wireless keyboard with a trackpad. This will allow you to control your computer remotely and eliminate the need to stand up to set anything.
Alternatively, Reddit user SimplicityCompass offers a great suggestion: Use a wireless Xbox controller in combination with JoyToKey. You can then map the mouse X and Y to the joystick and the mouse buttons to the controller’s trigger. Finally, map one of the buttons (I choose “A” to F4 in order to maximize in Virtual Desktop. That way, you’ll have all the tools required to watch your movies in the palm of your hand.
How to watch Youtube videos with the HTC Vive
The easiest way to watch Youtube videos is going to be to use either the BigScreen or Virtual Reality application, both available on Steam. From there, use the browser of your choice, navigate to www.youtube.com and watch your video!
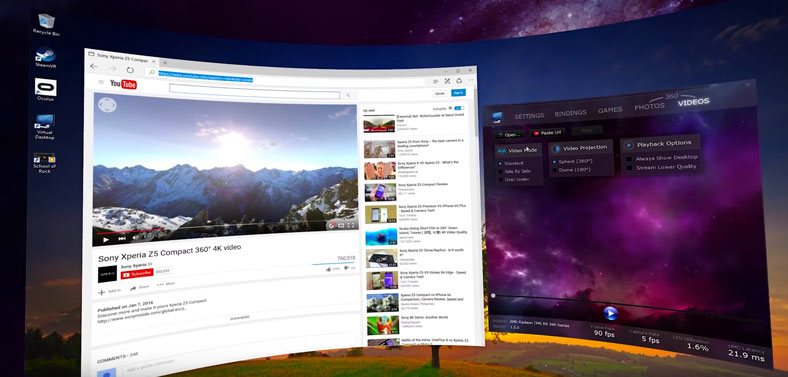
- Start Virtual Desktop or BigScreen
- Navigate to www.youtube.com with the web browser
- Enjoy!
(Yes, it’s that simple) If you want to watch 3D Youtube videos, you’ll have to copy/paste the URL into the the Virtual Desktop “3D Videos” window.
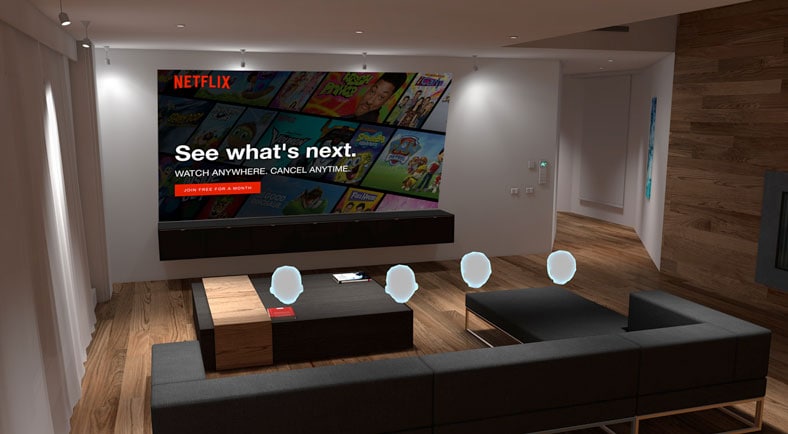
How to watch Netflix using the HTC Vive
Until Netflix releases a dedicated app for the HTC Vive, currently the only way to watch it is through a virtual reality desktop application such as Virtual Reality and/or the Big Screen app. Unfortunately when using these apps, the Netflix resolution will be diminished. C’mon Netflix, release your HTC Vive app!
- Start Virtual Desktop or BigScreen
- Navigate to www.netflix.com with the web browser
- Log in
- Enjoy!
How to watch Blu-Ray discs using the HTC Vive.
Fortunately VLC has recently started supporting Blu-Ray discs which makes watching them in VR a breeze.
- Get VLC player.
- Get Virtual Desktop and/or Bigscreen.
- Start the virtual desktop application of your choice and once inside, start the VLC player.
- Load your blu-ray using VLC.
- Press F6 and enjoy!
How To Enable The HTC Vive Pass-through Camera
The camera on the HTC vive isn’t exactly what you think. I figured it would show me the world however it actually augments the reality around you so you don’t run into things. To enable it, go to the SteamVR app, settings, camera and the click on “enable camera”.
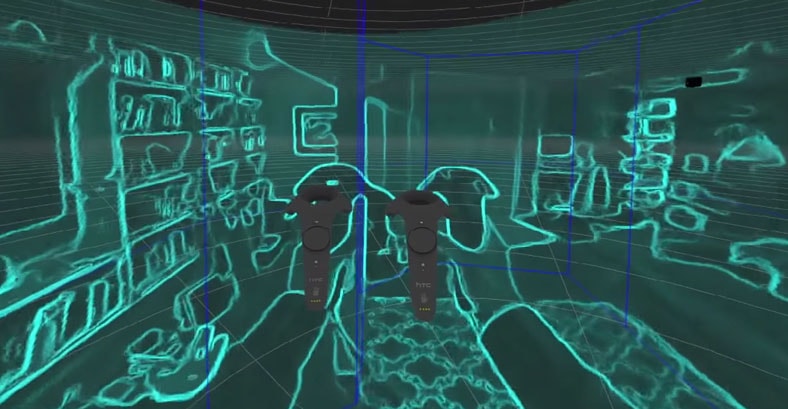
Photo Credit: Zulubo Productions
- Go to SteamVR Settings
- Click on camera
- Click “Enable Camera”
You’ll feel like your in the matrix when you get close to your virtual borders.
Extending The Range Of The HTC Vive
There are a few ways to get more range out of your HTC Vive which can be useful if you want to use your headset in a large room or further away from the computer. One undocumented feature is that you can actually daisy chain two controller boxes together however in practice it will be next-to-impossible to find a second controller box so you’ll likely want to proceed to the next option.
Te easiest way is to start by extending the cables from the computer to the controller box by using high quality extender cables. Do not try to extend the cables between the headset and the controller box because they are already at the maximum distance.
Basic (10 feet extension)
If you’re looking for a modest range extension for your HTC Vive, this can be perfect for you.
- Buy a 10 feet USB cable (male to male)
- Buy a 10 feet HDMI cable
- Buy a power cord extender (Optional)
- Replace both the HDMI and USB cables between the computer and the controller box
- Enjoy
Long range (30+ feet)
For longer distances, you’ll start to run into power issues and data loss if you just try to use longer cables. We need a slightly more advanced solution in the form of active HDMI cables and USB over Ethernet. It’s not that complicated, you just need slightly more expensive parts!
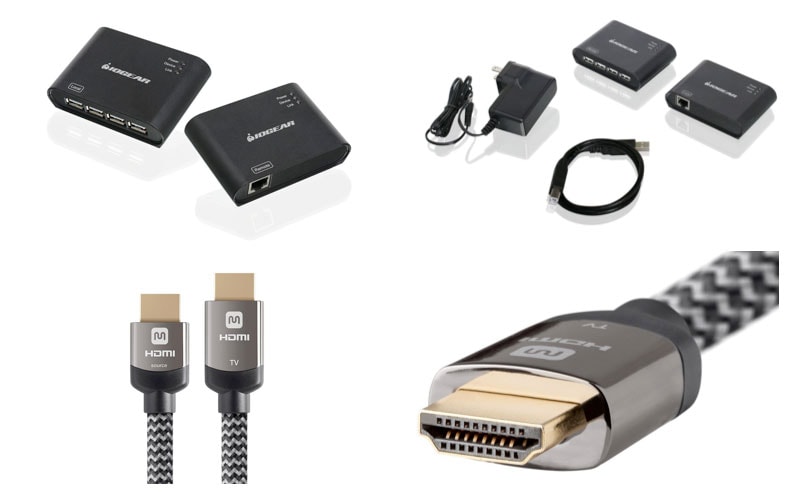
- Buy a USB over Ethernet kit
- Buy an active 30 feet HDMI cable
- Buy a 30 feet Cat 6 Ethernet cable
- Buy a 25 feet power cord extender (Optional)
- Combine the USB over Ethernet adapter with the 30 foot Ethernet cable
- Replace both the HDMI with the active HDMI and USB/Ethernet solution between the computer and the controller box
- Enjoy
This should give you considerably more range with a negligible latency increases of only 1ms. (You can check the latency using Virtual Desktop).
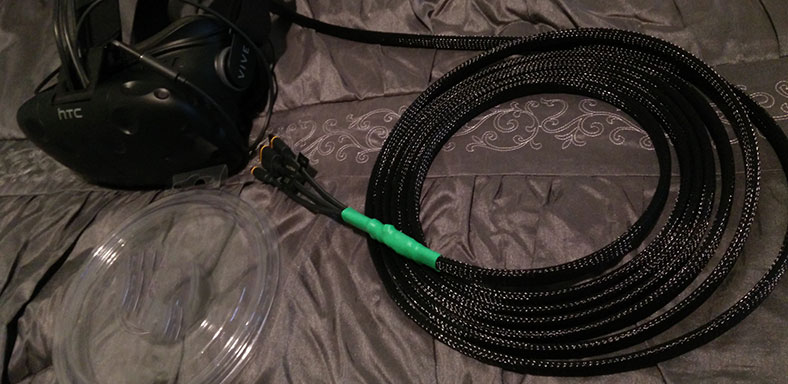
Increasing cable strength
Because you’re likely to be pulling, walking and running all over your headset cable, you can take per-emptive measures and increase the resistance of your cables by using a braided sleeve to protect them. (Plus, it looks really cool).
To do so, you’ll need two items:
- At least 5 meters of PET 1/2 inch braided sleeve
- 2 Pieces of heatshrink material for the ends
From there, you just need to wrap your cable up with the braided sleeve and use 2 pieces of heat shrink tubing on each end. And because a picture is worth a thousand words, here’s what the final result should look like. (Picture by Fragger56)
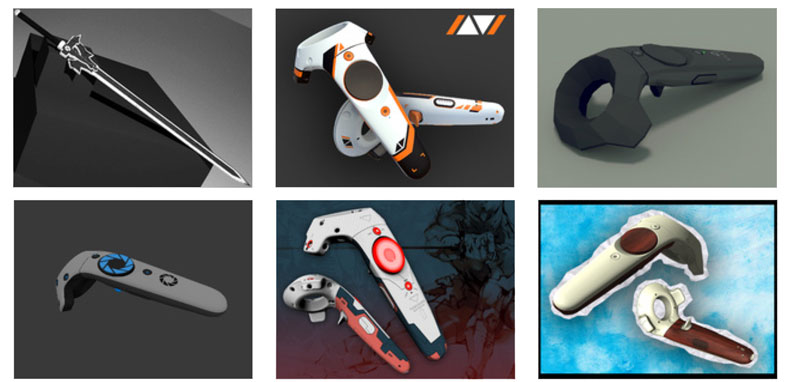
Modding The HTC Vive Controllers
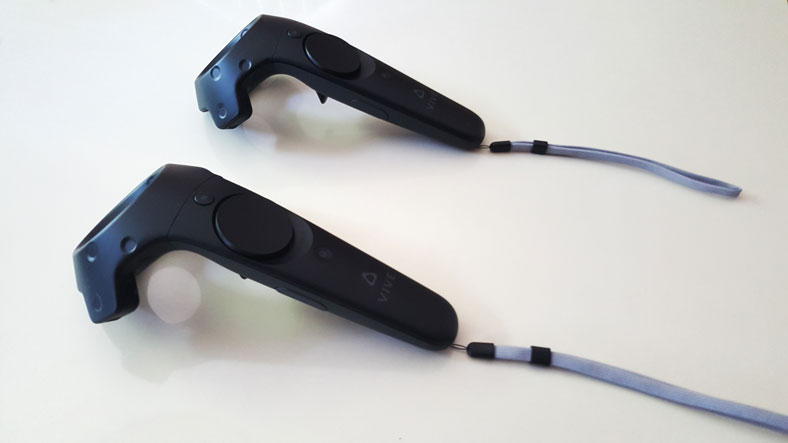
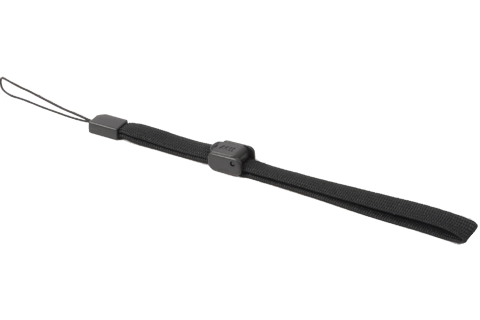
The controllers that come with the HTC Vive are amazing. If you’re craving to personalize your controllers, you can replace the bungee cord with these aftermarket ones from the Nintendo Wii.
Aftermarket Wrist Straps
Not only are the Nintendo Wii straps extra strong, they are also extremely inexpensive. You’ll want to get them directly from Nintendo to make sure you don’t get a knock-off.
Upgrade your controller to magnetic charging controllers
A very simple mod you can do is install magnetic MicroUSB inserts in your controllers to make use of magnetic USB cables. This allows you to quickly snap in and out your controllers for a quick charge. Plus, they don’t break if you accidentally pull on the wire!
- Get this replacement magnetic USB kit (2 Pack)
- Install one MicroUSB tip into each controller
- Use the magnetic cables provided to quick charge your controllers
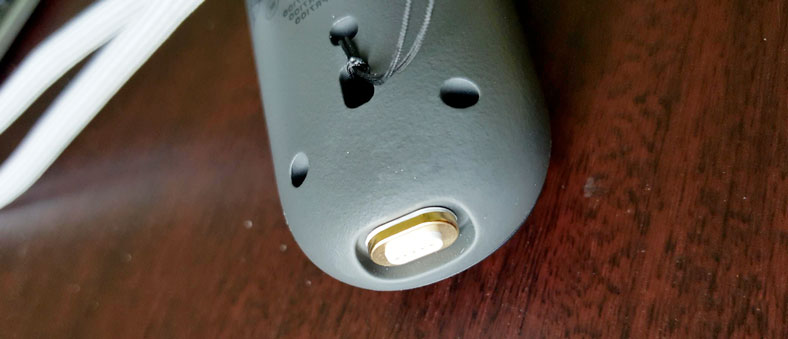
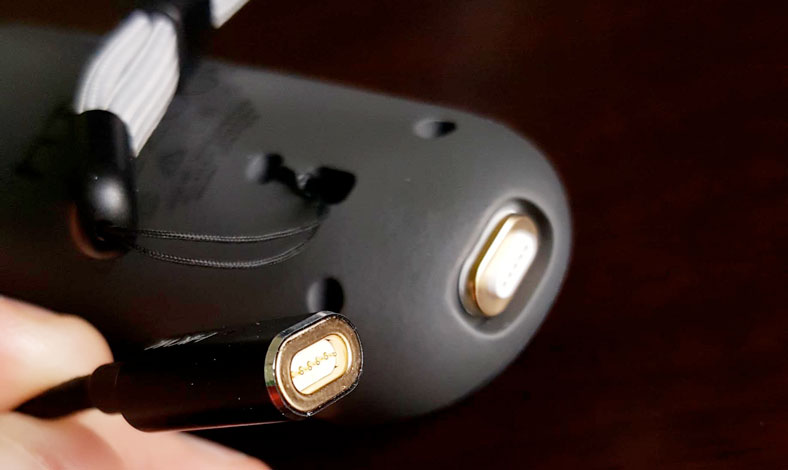
Photo Credit: Ixobelle01
Skins for your controller
Alternatively, you can also mod the way your controllers look IN-GAME. The steam workshop has added many skins that you can use with your controllers.

 Recording Your Gameplay With The HTC Vive
The easiest way to record yourself playing HTC Vive games is either using Shadow Play or Open Broadcaster Software (OBS) and determining which is for you will very much depend on your requirements and computer’s specifications.
Let us take a look at how to install each:
Recording with Shadow Play
- Go to GeForce
- Click the “Download button” under GeForce Experience and install on your PC
- Go to Preferences > Shadow Play > Set file location to which ever folder you want it saved
- Select “Camera On” to activate your camera
- Launch your HTC Vive VR and select the game you want to play
- Apply full screen by clicking “Job Simulator” at top left of screen.
- Hit Alt F9 and you are now recording
- Enjoy
Shadow Play Capabilities & Performance
- Shadow Play is less demanding performance wise compared to OBS
- Limited to NVIDIA graphics card (does not work with AMD)
Recording with Open Broadcaster Software

- Go to OBS Project
- Click the “Download button” depending on your operating system and install
- Right click Scenes > Add Scenes > give it a name
- Right click Sources > Add > Window Capture
- From Window drop menu > Job Simulator (for every time you want to switch a game)
- Click “Start Recording” button and you are now recording
- Enjoy
OBS Capabilities & Performance
- Alternative method if you do not have NVIDIA graphics card
- Different overlays of camera & mic recording at same time (all on one application)
- Very demanding on computer resources (CPU & GPU)
For more a more detailes on setting up Shadow Play & OBS, watch this excellent Youtube video.
How To Play Emulated Games On The HTC Vive
One of the great unofficial benefits of owning a VR headset is that you can play all kinds of games on it (even some that weren’t originally intended to be played on VR). Here’s how you can play emulated games using the HTC Vive. (Please don’t ask where to get the games nor discuss them in the comments. We can’t cover that).

- Download the Dolphin VR for HTC Vive installer
- Install Dolphin VR
- Click on config: Enable cheats (Not to cheat but required to bypass game restrictions)
- Select graphic configuration: Select DirectX 11
- Select 1920×1080 resolution mode
- Check enable full screen
- Configure your controller in the controller tab (this will vary depending on which controller you have)
Congrats, you’re now ready to play emulated games! With many games you’ll have to enable culling which allows you to look around freely. To do so, follow the next steps.
- Right click on a game, click properties
- Go to AR Codes tab
- Check the “Disable culling” boxes. Most of them will work and will allow you to look freely. (Some of them might be buggy!)
For more a more detailed walk-through, watch this excellent Youtube video.
Advanced Undocumented Troubleshooting
Let’s be upfront about this: the HTC Vive release was rushed and it certainly came with it’s fair share of bugs. As time progresses, these are being ironed out however with so many components (both hardware and software) there are still quite a few issues. Even though this is far from an exhaustive list, here are some undocumented fixes that can help you:
Headset not detected
After weeks of trying to figure out why my headset wasn’t being detected properly (Error 508), I finally figured out that running steam as an administrator resolved all my issues.
- Install Steam and SteamVR normal.
- Close Steam.
- Right click on the Steam icon (not steamVR, but the base steam) and right click then select “Run as administrator”.
In some situations, using your own display port cable will help with connectivity issues.
Games not loading
Even though the HTC Vive is supposed to be compatible with Windows 7, 8.1, you really need to have Windows 10 if you want to minimize the amount of issues & bugs that you run into. Many games (Such as PoolVR and Mini-Golf) don’t work properly under Windows 7 and work great when you run Windows 10.
Unofficial Videocard support
Don’t let HTC fool you, you can run the HTC Vive on videocards such as the GTX 780 and even though you do get a better experience on cards such as the GTX 1080, they definitely aren’t necessary. In order to determine if your computer is capable of running VR applications, you’ll want to download the official Steam VR Ready testing tool.
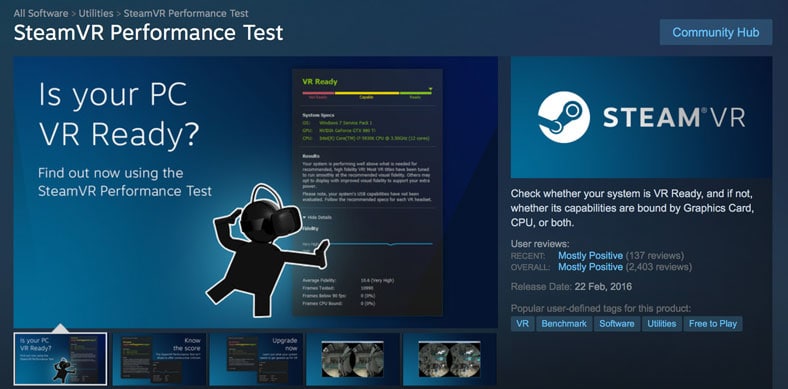
If you’re in the “acceptable”, you should be good to go! (The HTC staff will tell you that you need a GTX 970 or higher, this simply isn’t true.)
Jitters
Determining jitter can be a little tricky, if you are new to the virtual reality world you may not even know it is there at first. However, after clocking up some VR hours, you may start to notice it, when once it was undetectable. Therefore it is always a good idea to do some of your own testing right off the bat.
The first thing to determine is if your hardware is in good working order and is not the cause of jitter. Start by leaving your headset on the ground bang smack in the middle of your play zone. Carefully take a look at your monitor and see the level of jitter (or wobble) taking place.
Note: a little level of movement is normal, if however, there is significant image shake then it is time to look at other factors that could be causing it before concluding your headset is defective.
- Secure the base station wall brackets firmly against the wall, making sure they are completely stable. This includes tightly securing the wing nut that holds the bracket to the station.
- Position your base stations in opposite corners of your virtual reality space.
- Place both base stations a minimum height of 6 1/2 feet (2 meters) for maximum accurate tracking.
- Loosen the clamp that allows the base station to pivot. Move it somewhere between 30° & 45° downward so that it is pointing towards your play area. Be sure to tighten the clamp back up so that the whole base station is as stable as possible.
- Remove the protective films from the face of the base stations and be sure to clean up any surface grease such as finger prints.
- Be sure that both base stations have an unobstructed view of one an other. They must be able to see each other for optimal tracking of the headset.
- Avoid anything reflective in the room. Remove any mirrors, television sets, wall pictures with reflective glass and anything else that is highly reflective.
F.A.Q. about HTC Vive
Here are some of the most common answers to the general questions we receive about the HTC Vive.
Where do you buy HTC Vive?
 You can buy the HTC Vive from HTC directly and from Amazon retailers. The price is currently cheaper if you order from HTC directly however the shipping might be faster from Amazon.
What is the HTC Vive price?
 The official price of the HTC Vive is $799 USD excluding the computer that is required to run it. Due to the limited availability and high demand of the HTC Vive, many retailers are charging a premium up to $1199 for the Vive.
Are the HTC Vive games compatible with the Oculus?
 Yes and no. Even though HTC Vive does not prevent you from running the Oculus headset there are some HTC Vive games that do not work properly on the Oculus yet due to lack of controllers available for the Oculus. However HTC Vive games are not locked and exclusive to the HTC Vive.
How to use the HTC Vive without drilling holes?
To use the HTC Vive without drilling holes in your walls you’ll want to use camera tripods to mount the sensors. For a detailed guide on how to do this, visit our mounting section in this first part of this guide.
How to use the HTC Vive without room scale?
You may use standing-only to use the HTC Vive without a full sized room. To do so, go to “settings” and then “room setup” in the SteamVR applications and select “Standing Room”. Some the games absolutely require room-scale so this can limit your options.
Can you fly a drone with the HTC Vive?
We are currently developing a way to fly some of the best drones with the HTC Vive headset in partnership with our review site. The plan is to control the movement of the drone with the controllers while you look around with the headset. We are currently in the first phases of development.
Links and Resources
Here are some great additional resources for the HTC Vive.
- HTC Vive Sub-Reddit
- Unofficial second HTC Vive Sub-Reddit
- HTC Support Page (Hint: Use LiveChat)
The most efficient way to get support for your HTC Vive is through the “Live Chat” function on their site. I went back and forth with them for a week using the email system until they finally asked me to just go on the “Live Chat” to get headset detection issues resolved. If you want the fastest results, go here and click on “Live Chat”.
Do you have any additional tips we should include in the guide? Let us know in the comments!
Click on the star rating to select your rating.
[rating_form id=”2″]